Buttons, buttons, whose got the buttons?

Posted on

It’s done! Almost! It still needs buttons, but that doesn’t count, does it?

IMG_1594

The pattern is from a story book called Phoebe’s Sweater. I started knitting on it last summer, and it’s only needed the hood finished for a few months. It’s more like a coat than a sweater, and I made the biggest size ’cause I had no idea how long it would take me to finish it. Plus, now she can wear it for a while. There’s a pretty pattern around the edges, which you can’t see in the picture.


Caty-Pillar

Posted on

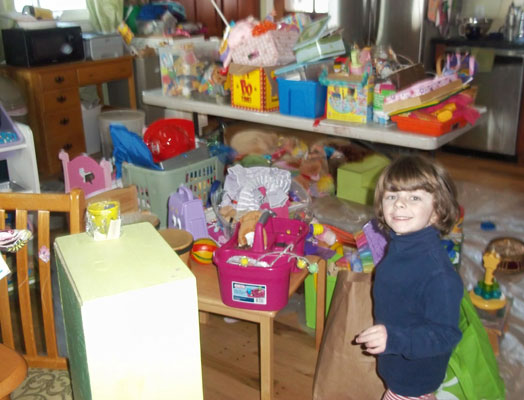
When I was a kid, I was a pack rat. (I’m not that way now, oooooh no. Erm.) I kept so, so, so many of my old toys and knick knacks and random doodads. Boxes and boxes of this stuff has been living in our “workshop” building for the the last seven years. When Anya fell in love with My Little Pony this spring, I decided it was past time we went through those boxes of my childhood because I was sure I had at least one MLP in there somewhere.

It’s amazing to me how I can look at these things now and most of them mean nothing to me anymore. I remember them and know they did mean a lot to me when I packed them up oh-so-long ago. These were things I could not bear to let go. These were things I had to keep and treasure and lug around for 15 years. On that day when I was going through those boxes, though, most of those things had become just things. Phew. What a feeling of relief I could let this stuff go!

But then there is the other stuff that still means a lot. It’s probably still too much. Too many boxes. But it’s nice to see these toys of mine being loved again.

IMG_1234

And not just by me…

IMG_1233

(Yes, I did find the pony.)


Happy Anniversary!

Posted on

Andy and I haven’t had a trip away on our own since before the kid came along. I think that is breaking some cardinal rule of coupleness, but hey, we’re still married so it must not be too cardinal! (Maybe more like robin or bluejay?) When my folks came out for spring break, Andy and I somehow convinced them to watch Anya for two days while we went to D.C. for an early anniversary vacation.

During our trip we ate yummy food,

IMG_0197

and went to monuments,

IMG_0215

and ate more yummy food (nary a chicken nugget nor mac and cheese plate to be seen),

IMG_0193

and went to museums (not once having to leave due to a temper tantrum),

IMG_0180

and ate more yummy food (never being interrupted to take someone to the potty),

IMG_0173

and visited even more museums (where we were able to read the stuff about the exhibits),

IMG_0188

and then ate some more yummy food,

IMG_0251

and finally ended up sitting in Union Station for several hours waiting for our bus back home. (I could have done without that last part.)


Swap Update

Posted on

I had a difficult time coming up with an idea for my next swap item. I felt like it needed to be something new — something I’d never tried before. I’d set the bar too high for myself trying all sorts of new stuff with my first two, and I was just hitting a wall made of crafter’s block and The Busy. So, I did what any self-respecting procrastinator would do, and I didn’t do my cards for two months.

Thankfully, a recent crafty weekend gave me a chance to get caught up and to let that guilty weight of card IOUs go. I stared at the “something new — something I’d never tried before” cards I had started back when I wasn’t behind on the swap, and then I got cranky and glared at them and stuck out my tongue and said “NERFLEBLUFFLER!” (I did these things in my head because there were other people there, and I want them to keep inviting me to crafty events.) In the end, I made cards that were “something new — something I’d never tried before.” They weren’t, however, super complicated or time consuming. They aren’t novel for most folks. They aren’t cards I felt any need to take step-by-step photos of. But, I like them, and almost everything I used to make them, except the card base, came from my swap packet. That was pretty awesome.

IMG_1004

This “Thank You” card was made using a (mostly) simple weaving technique. I admit I put the glue on the wrong sides of the strips a few times. Luckily I had lots of extra paper. Next, I did a birthday card.

IMG_1007

I took the photo of the card with the best bow. I don’t tie very good ribbon bows at the best of times, but at 1am…well. Sorry to all my fellow swappers whose bows were less than awesome. I tried.

I have two more weeks to get my June swap items done before I am once again tardy. Maybe I can have Anya make them?


Blub Blub

Posted on

Ever since The Winter of Aquatic Death, I’ve been ignoring the aquarium. We are down to two tiny fish, a swarm of planaria, and some algae. Both the light bulbs burnt out several weeks ago. The water was a bit cloudy. I was even starting to use my secret mind powers (which I generally only use on dishes and laundry) to make the entire aquarium disappear. Anya told me she wanted to get some more fish, but I’m not going to put them into a home that resembles an underwater Dickinson orphanage. What do I do when things get messy? Clean Sweep ’em!

I couldn’t really take everything out of the tank and put it into piles, so instead I went to the pet store and bought new light bulbs. I am so wild and crazy. Even wilder and crazier than that? I didn’t leave the light bulbs in the car for two weeks. I didn’t let them get lost on the kitchen table for an entire season! Nope. I replaced the light bulbs right when I got home. I walked in the door, dropped my stuff on the floor, and changed those light bulbs! I really think I deserve a gold star for that alone, but it doesn’t stop there. Oh no, it does not.

After the tank was once again illuminated, I could see how much algae was growing on the sides, so I decided to scrub that off. Then I noticed all the flotsam dangling off the plastic plants and the princess castle. Those definitely needed to come out for a good washing. And heck, if I’m going to do that, why not break out the gravel sucker and suck up some muck? WOO! I really need to remember how much fun gravel muck sucking is because if I do, maybe I’d do it more often. It’s so much fun it’s sort of dangerous since I can easily get distracted by all the fun and suck up a fish or suck out so much water the fish end up flopping around on the gravel like in that horrible asthma commercial. Don’t worry. I managed to contain my fun adequately.

The aquarium is now beautiful and clean and tidy. I even rearranged the plants and other decorative items to give it a total Clean Sweep make over. The fish seem happy. I’m not so sure about the planaria, and I’m hoping the algae has suffered serious setbacks. But who cares about them? It’s time for more fish!

IMG_0036 (Any store is a toy store when you are Anya.)


Yearlong Crafty Swap – Month 2

Posted on

My packet maker, Ginger, is a big-time stamper, and so it makes sense that my swap packet has a lot of stamped images. See, you don’t actually have to give someone the stamp for them to use the image. You can stamp the images on card stock and share them. Makes total sense, but for some reason this never occurred to me until I starting hanging out with Ginger. (Did you know there are digital stamps? Of course there are.) I haven’t done a lot with stamps even though I have quite a few. [There was that time I made my own stamps out of all sorts of weird things like pine needles and soda cups and clay pressed into air vent grates, but that’s sort of different.] This month’s swap I decided I’d take some stamped images on my journey out of my comfort zone.

While there are a billion different colors of stamp pads out there, stamped images definitely aren’t limited to just the one color that the stamp is stamped in. That is definitely an option, as is using markers to color onto the stamp to make the image. But as long as you are just stamping, there’s all that white space in the images just begging for color. Ginger and Kristy (another big-time stamper) spend a lot of time coloring, and while I like coloring myself, I generally prefer the crayon-in-book sort. Not only is my stamp-coloring-in experience newbie level, so is my stamp-coloring-in marker collection.

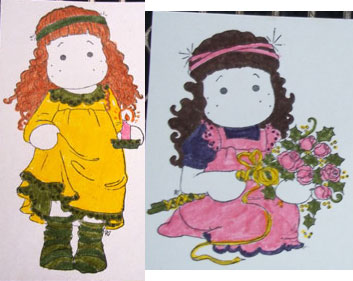
Although our swap cards don’t have to be the same for all 6 cards we make each month, I personally like it when the ones I am making are. I didn’t have six of any one image, but I had two very similar images with three copies each. I colored the images, and with each one finished my appreciation grew for the skill and work Ginger and Kristy (and other stampers) put into their colored images.
card5

The colored images were okay, but I was deeply bothered by the vampire-pale skin the girls had. My marker collection didn’t have anything remotely skin toned that wouldn’t cover up the face details. I pondered colored pencils, but somehow mixing pencils and markers seemed a lot like putting oregano on strawberry cake. (Anya has been bugging me to make strawberry cake for about two weeks. But not with oregano.) The images sat for about a week until I had a little bit of time to myself, and then I started heating up the kettle.

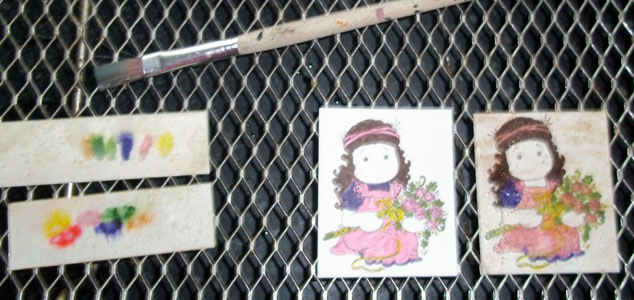
I decided to give my painstakingly colored gals a tea bath. I thought the markers I’d used were non-water-soluable, but since I didn’t have any images to spare I didn’t want to take a chance. I used my keen experimenting skills and created some sample pieces to use with different tea-staining methods.
card3

In this image, the rainbow strip on the bottom was directly submersed into the tea. The colors ran a lot. I tried another strip where I blotted the tea onto the paper with a paintbrush. The colors still ran, but the borders seemed to hold better. I tried using the paintbrush blotting on one image, and although the colors ran more than I wanted, I was sort of committed. By the time I’d finished all six pieces, I was feeling better about how the images looked. In fact, I was really digging how the colors washed out so the stamped details below came through. I also liked how the borders ran together and how everything was softer and less bright-n-fresh-n-new looking.

card2

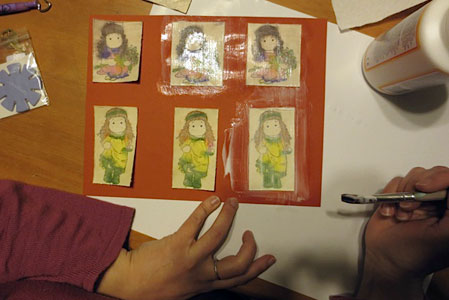
After the images dried, they were a bit curled. I roughed up the edges with my edge-distressing thingy (does it have a real name?), and I pondered leaving the images like that. But, it just didn’t seem quite right. I put the images back in the bag and pondered some more. And went to Michael’s. And bought Modge Podge. I don’t think I’ve used Modge Podge since I was a kid and my Mom helped me decoupage some favorite post cards onto wooden plaques to hang on the wall. I put the images onto some orange card stock and then modged over the whole thing.
card4

When the Modge Podge dried, I finally felt like the images were done. Phew. I pulled out some patterned paper from my swap packet and then dug into my collection for blank cards, some twine (that came with the tags I bought for Month 1), pattern-cutting scissors, and the corner rounder. Wham! Bam! Tie! Glue! Snip!
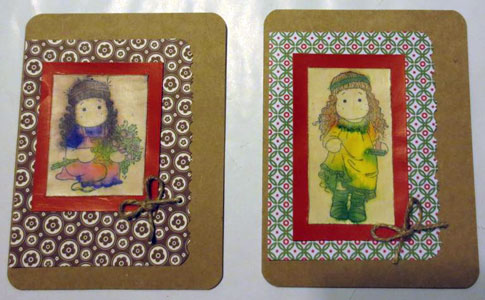
card1

I handed out four of the six cards at our crafty day yesterday. The cards are definitely more awesome in person than in these not-so-awesome photos. Everyone seemed to like them. At least, no one used their card as a coaster or a blotter or a shim under a wobbly table leg.

So, that’s Month 2 done and here’s March only a wee bit done. Dare I start Month 3, or should I wait to spread out the fun?


Yearlong Swap – Month 1

Posted on

After our holiday tag swap, my crafty group decided we’d keep the swapping going. Because we are all busy folk, and we don’t see each other as often as we like, we decided to make one yearlong swap instead of trying to set up swaps each month or season or whenever we thought of it. Those of us who had swapped material packets last time seemed to have made that look sooo awesometacular that all 7 folks participating in this swap wanted to do it, too.

For this, the First Annual Queen Bee YearLong Swap, we all switched packets. Each month each crafter picks an item off the list (e.g., birthday card, thank you card, gift tag), makes six of those item, and delivers them to the other six folks in the swap.

Here’s my packet from the awesome Ginger:

100_3622

Ginger and I have different styles, so while everything in this packet is pretty, most of it isn’t stuff I would normally pick out on my own. At first this made me feel a bit uncomfortable, but then I realized this was what I wanted! A chance to try some new things! I also realized that I didn’t have to take the packet literally. That is, I didn’t have to actually use the physical items from the packet to use the packet. (Huh?) I found several pieces of paper in the packet that inspired me, but I didn’t want to use the actual paper. Instead, here is what I did.

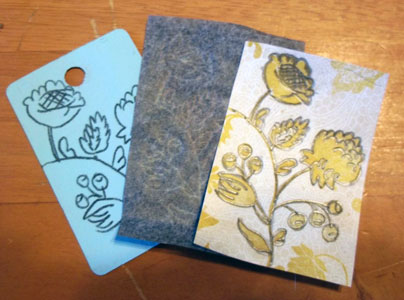
First, I used acrylic craft paint to sort of rough coat some store-bought gift tags a pale blue. Then, I found the part of a piece of patterned paper from my packet that had some really pretty flowers on it. I cut out just that part, and then, using carbon paper, I transferred the flower image onto the tags.

100_3999

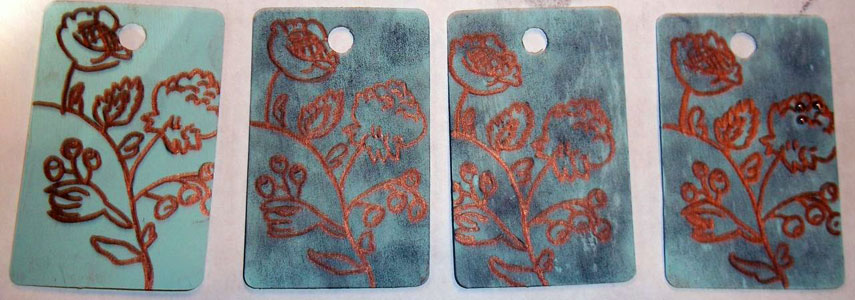
There was a part of me that really liked how this looked all on its own but not for this project. I could see myself using this technique again somewhere else and leaving it with just the carbon image. For this project, I bought a copper metallic paint pen and traced over the transferred image. Helpful hint, use a sharpish pencil to transfer the image if you want to cover with a paint pen. Because my pencil grew dull, the transferred image was a bit wide, and the paint pen did not completely cover it in all places. It looked a bit sloppy. Plus, the tag still seemed a bit bleh. So, I dug out my distressing kit next (which isn’t distressing in of itself). I put black distressing ink over top of everything, and that helped the leftover carbon bits blend in. Then I used sandpaper to rough everything up and sort of mix it together so it looked more put together. Finally, I put a little bit of bling on the tags with some little teeny pearly stickons that were in my packet.

100_4002

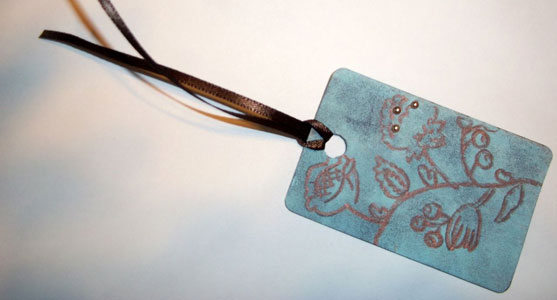
The tags I’d bought came with twine, but the finished tags called for something a bit more elegant, so I tied them off with brown ribbon from my stash.

100_4007

I’m not totally in love with the actual final product because they seem a bit rough to me. Sort of like I needed a bit more practice with what I was doing before making a final product. I really liked the image transferring with the carbon paper, and I definitely want to do that again.


Let’s Swap!

Posted on

Towards the end of last year, a group of my crafty pals decided we’d do a holiday tag swap. If you don’t know much about the crafty world, let me tell you that crafty folks (at least the paper crafty ones) really like to do swaps. Our group, The Queen Bee Croppers of NRV, has been around for three or four years now, and though we’ve talked about doing a swap many times, this was our first.

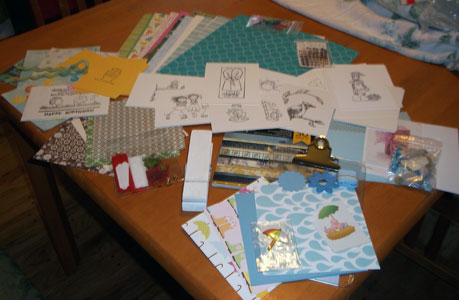
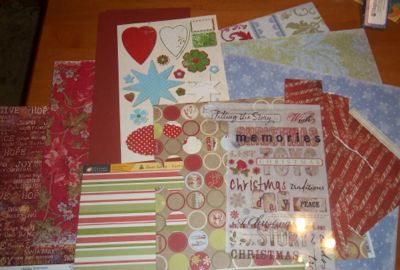
We had five folks participate, and of those five, three of us decided to add an extra level to the swap. We each made up a packet of stuff from our craft stashes and switched. I really love this sort of thing where you get a bunch of stuff and you have to make something out of it. I think it’s a great chance to work with items you wouldn’t normally choose, and I think it encourages stretching those creative muscles. Here are the materials I got in my swap packet:

100_2915

My packet was almost all paper, which threw me a bit. Then I started looking at things and realized the stripey paper would make a nice ribbon and the circle paper would make nice little medallion thingies. I very much wanted to make my tags using only the items in the packet (plus adhesives of course), and I almost did. Alas I broke down and used some of my quilling paper. I tried to make quilling strips from the papers in the packet, but nothing really worked.

Here’s one of the tags I made. They are supposed to be little Christmas packages.

label


Operation Clean Sweep

Posted on

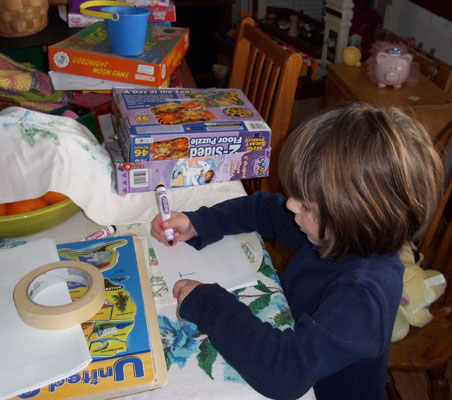
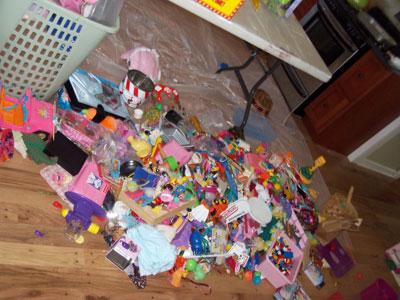
Back in the day (I’m not sure which day it was), I loved watching a show called “Clean Sweep.” It was the perfect mix of “Hoarders” and a room re-design show. The cameras peeked into the chaos of the house of a “normal” family, and after those of us watching on tv had a chance to remark about how cluttered the place was, the host ordered his peons to take everything in the rooms (they did two rooms per show) outside. The homeowners would walk outside and see the mess of their rooms spread out in the front yard for all the neighbors and all the world to see. It looked something like this (but outside):

100_3641

The host had four piles staked out in the yard: keep, sell, donate, trash. The homeowners didn’t get to make their own signs, but if they did, it might have looked like this:

100_3644

In about 12 tv minutes, the host and the homeowners went through ALL the stuff and whittled down the pile to a fraction of the original heap. To get from Point A to Point B, though, things could get really messy and crazy and wild and look something like this:

100_3645

Finally, the peons loaded the “keep” stuff back into freshly redesigned rooms while the homeowners had a garage sale and made tons of money because everyone wants to be on tv even if it is just buying someone’s junk at a yard sale.

I’m realizing now a flaw in this post…the kid is asleep and I didn’t take a picture of her freshly redesigned room. I guess I’ll leave you hanging!


My letterpress saga

Posted on

I’ve been dreaming about letterpress printing ever since I saw a kit in the craft store a few years ago. I did tons of research and window shopping and drooling, and then I started dreaming about a real letterpress press. Alas, I don’t have thousands of dollars to buy a real one (or a place to put one). I went back to dreaming about the made-for-crafters-not-real-printers kit. I found a great review of it somewhere from some dude who is a real printer, and he liked parts of it but not others and suggested other non-kit parts that were better. I put the good parts on my wishlist and waited. Andy bought one part of it for me for a gift about a year and a half ago, but not the other part. (He did not fully understand the complexity of all the parts. It’s okay. His geekdom lies elsewhere.) Over the next long, long while, I sat around and sadly pondered how I only had part of the stuff, wondering if anyone would ever give it to me as a gift. (Did it ever occur to me to buy it myself? No. That would make too much sense, and then what would I sit around sadly pondering??) Finally, this Christmas my brother gave me the final part, and my dream has been realized!

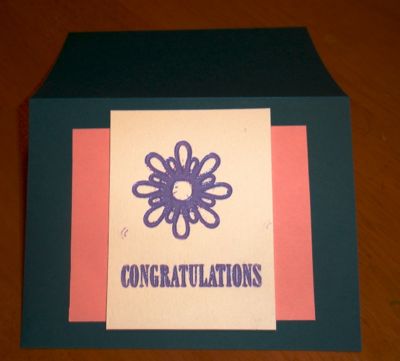
The image is a bit splotchy and the colors are a bit weird and you probably can’t even tell its indented into the paper, but I don’t care. I’m excited! It’s not too difficult, it’s fun, and some day I’ll have the stuff I need to clean up the ink properly! (Hint: Not water soluble.)

The printer dude who did the review recommended a great place to get custom plates made for cheap, and so I shall now begin to ponder my 2013 Christmas card, which will arrive in homes around the world this December!