Buttons, buttons, whose got the buttons?

Posted on

It’s done! Almost! It still needs buttons, but that doesn’t count, does it?

IMG_1594

The pattern is from a story book called Phoebe’s Sweater. I started knitting on it last summer, and it’s only needed the hood finished for a few months. It’s more like a coat than a sweater, and I made the biggest size ’cause I had no idea how long it would take me to finish it. Plus, now she can wear it for a while. There’s a pretty pattern around the edges, which you can’t see in the picture.


Swap Update

Posted on

I had a difficult time coming up with an idea for my next swap item. I felt like it needed to be something new — something I’d never tried before. I’d set the bar too high for myself trying all sorts of new stuff with my first two, and I was just hitting a wall made of crafter’s block and The Busy. So, I did what any self-respecting procrastinator would do, and I didn’t do my cards for two months.

Thankfully, a recent crafty weekend gave me a chance to get caught up and to let that guilty weight of card IOUs go. I stared at the “something new — something I’d never tried before” cards I had started back when I wasn’t behind on the swap, and then I got cranky and glared at them and stuck out my tongue and said “NERFLEBLUFFLER!” (I did these things in my head because there were other people there, and I want them to keep inviting me to crafty events.) In the end, I made cards that were “something new — something I’d never tried before.” They weren’t, however, super complicated or time consuming. They aren’t novel for most folks. They aren’t cards I felt any need to take step-by-step photos of. But, I like them, and almost everything I used to make them, except the card base, came from my swap packet. That was pretty awesome.

IMG_1004

This “Thank You” card was made using a (mostly) simple weaving technique. I admit I put the glue on the wrong sides of the strips a few times. Luckily I had lots of extra paper. Next, I did a birthday card.

IMG_1007

I took the photo of the card with the best bow. I don’t tie very good ribbon bows at the best of times, but at 1am…well. Sorry to all my fellow swappers whose bows were less than awesome. I tried.

I have two more weeks to get my June swap items done before I am once again tardy. Maybe I can have Anya make them?


Not Your Mama’s Crafty Book

Posted on

It’s been a while, but I went to a crafty weekend a few weeks back. The second day I had a dire need for adhesive (“How can you need to buy more stuff? You have tons of stuff!” Andy asked. He obviously doesn’t understand adhesive.) I made a run to the craft store, and of course (since I was there ALL ALONE) I had to spend a few minutes or maybe thirty looking at EVERYTHING. It was nice to peruse, but I’m pleased to say the only thing I bought that was not adhesive was a two-pack of 8×8 scrapbooks on clearance for $3.

I thought about using the books to make some gifts, but then I figured maybe Anya would like one. When she saw it, she squealed. And then she claimed BOTH of them. I should not have been surprised. I let her use my funky scissors and gave her some old adhesive tab thingies I got from the free bin and pulled out my paper scrap bag and donated unused pictures from my last book. She worked on her “Crafty Book” for hours. Or at least maybe half an hour. It felt like hours to me. When she got her pages just right, she had her Daddy do the journaling for her, and I made the title for the front: “Crafty Book by Anya.”

IMG_1010

After she finished her book, she began assembling her “Crafty Bag.” Into a small tote bag she put the funky scissors, adhesive tabs, picture bits, extra book, some markers, some crayons, some colored pencils, part of an old calendar, and basically half of the contents of her until-then-mostly-organized craft bins.

Today I was talking to one of my crafty friends at lunch about a convention we are going to in August, and Anya demanded to go, too. I said no because I am the Mean Mommie, but it was sort of hard to say it because, dude, she has her own crafty bag!


Everything old is new again

Posted on

Last weekend I finished putting down the pictures for my 2010 scrapbook. (If you know anything about folks who scrapbook, you’ll know we are almost always behind. And we really like to talk about adhesives.) So, unlike most scrapbook folks I’ve met, I approach my books with an assembly-line mentality.

Step 1: organize all pictures and memorabilia chronologically
Step 2: put down all pictures with some decorative paper
Step 3: journal on all pages (that’s where you write the wordy stuff)
Step 4: add all titles

This works for me. I’ve found that each of these steps requires a different sort of thinking and way of working, and when I tried to do all the steps for each set of pages one spread at a time, I got bogged down. I’m going to say that learning this (how I work) is why I am three years behind. Yeah, that’s why. (Of course there are those rare people — I know only one — who are current on their books, so they can do one spread at a time, all parts at once, easy peasy.)

So yeah, last weekend I finished Step 2 on 2010. To prepare for Step 3, I printed out all my 2010 blog posts. What a great help that is for me to remember what was going on in all those cool pictures. Today I started journaling for 2010 and was all, “Yay! Happy blog posts to help me” and then I was all, “Damn, I’ve only written about 10 posts in 2012 and 2013 combined. What the bleep will I write in those books?” This is a realization I have every six months or so, and then I start blogging again really faithfully. For about a week and a half. And then I forget. And then I finish Steps 1 and 2 of the next book. And then I remember.

An interesting thing about this is that by writing this post about how I haven’t been writing posts, I am fulfilling an inner need to write a post. But I’m not really writing about anything that would help with my next scrapbook. Unless I decided to make a scrapbook about scrapbooking. (I just had to google “a scrapbook about making a scrapbook.” I didn’t really find anything, but I didn’t try too hard.)

If I made a scrapbook of scrapbooking, what would I put on the cover page? It’d be neat to take a photo of the finished book for the cover, but how can I take a picture of it if I need the picture of it to finish it so I can take the picture so I can finish it? This is harder than I imagined!

So, the first spread could be of me going to the store to buy a book. I could include my sales receipt and maybe a copy of the craft store flier for that week; a copy of the coupon I used. I suppose before that I could have a photo of me digging through my stuff to see if I already had a book I could use, but then I’d have to take a picture of me throwing my arms up in resignation after three giant bags of yarn and a dozen paint bottles fall on my head when I open the craft closet.

The second spread would be me picking out which pictures to send to print and then getting the package in the mail and then sorting the pictures. Again we’re back to the chicken and the egg thing because I’d have to wait until I was done with the book so I had pictures to print so I could take pictures of me printing the pictures.

What next? Perhaps a spread where I take a scrapbook hiatus and make cards for a few months? Or maybe a montage from all the times I missed scrapbook opportunities with my friends because I was (a) sick, (b) snowed in, (c) out of town, (d) busy with a school or other kid-related function, or (c) incredibly forgetful.

I’d definitely need to include a spread or two of me going back to the craft store a few dozen times to get the doodads I need. And some of me climbing through the craft closets and stomping my feet when I can’t find what I need (which, of course, means I need to go back to the craft store). Perhaps I could write a short poem for this section called, “Where the bleep is my adhesive gun?”

There’d be a few pages of me cropping pictures and cutting paper and staring at paper and cutting more paper and sticking pictures and paper on cardstock and holding the results in the air and blinking a lot and sighing and pondering and going to get a snack.

Of course there would be some pages about crops/crafty days with friends. I’d journal some of the gossip (names removed to protect the innocent). I’d rate the comfort level of the chairs at the different crop locations. If I was feeling particularly spunky, perhaps I’d even do something daring like snitch one embellishment from each cropper present to use on these pages. Well, no. I’d probably just ask each person for something, and they’d give me something because crafters are generally like that.

And there would be some really dark pages there towards the end. From when I hit that super bleak spot around the end of Step 3 when I realize all I have left (ALL! HA!) is cutting 30+ titles out on the cricut and then xyroning them onto the pages. These would be tales of torture. Of the taunting light at the end of the tunnel hovering just out of reach, and no matter how fast you run the tunnel keeps getting longer so the light is always the same distance away and it’s just you stuck in that tunnel with the mechanical whine of the cricut and then you put the letters in the xyron backwards or you lose the “o” for “Snow Day” and you are all out of the exact right shade of white that you used for “Snw Day” or even worse yet your letters get all mixed up and you forget what you spelled out and then you have to play a twisted game of “Wheel of Fortune” to try and figure out what you wanted to say. These pages would be on black card stock.

The next spread would be the one where I start to wonder if the book really needs titles at all. There’d be pictures of me sitting, gazing off into the distance, thinking very hard about calling the book done as is. But then there would be a photo of me with a look of resolve on my face and maybe a rainbow sticker over my head as I realize I just need to push on.

At the end, I’d probably need to do a page with gratitude and acknowledgement of all those who’d helped me. Perhaps a list of the supplies I’d used. Because that’s what scrapbook people do. “This is the Smooshie line of paper from X,Y, and Z company. And the flower embellishments came from Flibbertygibbets.” Of course my list would be more like, “I used some paper I got from the free pile at the last crop, and the flowers were from…oh wait, was I supposed to put embellishments on this thing? Crap! Does that meant there is a Step 5? Am I not done yet! What the FNURFLE?”

The very, very last page, the one at the end that isn’t a spread but is just one page…that would be a photo of me with a gleam in my eye as I hold a stack of photos and another empty book and there would be a thought bubble over my head that says, “YAY! Time to start a new book! I can’t wait!”

IMG_0750


Yearlong Crafty Swap – Month 2

Posted on

My packet maker, Ginger, is a big-time stamper, and so it makes sense that my swap packet has a lot of stamped images. See, you don’t actually have to give someone the stamp for them to use the image. You can stamp the images on card stock and share them. Makes total sense, but for some reason this never occurred to me until I starting hanging out with Ginger. (Did you know there are digital stamps? Of course there are.) I haven’t done a lot with stamps even though I have quite a few. [There was that time I made my own stamps out of all sorts of weird things like pine needles and soda cups and clay pressed into air vent grates, but that’s sort of different.] This month’s swap I decided I’d take some stamped images on my journey out of my comfort zone.

While there are a billion different colors of stamp pads out there, stamped images definitely aren’t limited to just the one color that the stamp is stamped in. That is definitely an option, as is using markers to color onto the stamp to make the image. But as long as you are just stamping, there’s all that white space in the images just begging for color. Ginger and Kristy (another big-time stamper) spend a lot of time coloring, and while I like coloring myself, I generally prefer the crayon-in-book sort. Not only is my stamp-coloring-in experience newbie level, so is my stamp-coloring-in marker collection.

Although our swap cards don’t have to be the same for all 6 cards we make each month, I personally like it when the ones I am making are. I didn’t have six of any one image, but I had two very similar images with three copies each. I colored the images, and with each one finished my appreciation grew for the skill and work Ginger and Kristy (and other stampers) put into their colored images.

card5

The colored images were okay, but I was deeply bothered by the vampire-pale skin the girls had. My marker collection didn’t have anything remotely skin toned that wouldn’t cover up the face details. I pondered colored pencils, but somehow mixing pencils and markers seemed a lot like putting oregano on strawberry cake. (Anya has been bugging me to make strawberry cake for about two weeks. But not with oregano.) The images sat for about a week until I had a little bit of time to myself, and then I started heating up the kettle.

I decided to give my painstakingly colored gals a tea bath. I thought the markers I’d used were non-water-soluable, but since I didn’t have any images to spare I didn’t want to take a chance. I used my keen experimenting skills and created some sample pieces to use with different tea-staining methods.

card3

In this image, the rainbow strip on the bottom was directly submersed into the tea. The colors ran a lot. I tried another strip where I blotted the tea onto the paper with a paintbrush. The colors still ran, but the borders seemed to hold better. I tried using the paintbrush blotting on one image, and although the colors ran more than I wanted, I was sort of committed. By the time I’d finished all six pieces, I was feeling better about how the images looked. In fact, I was really digging how the colors washed out so the stamped details below came through. I also liked how the borders ran together and how everything was softer and less bright-n-fresh-n-new looking.

card2

After the images dried, they were a bit curled. I roughed up the edges with my edge-distressing thingy (does it have a real name?), and I pondered leaving the images like that. But, it just didn’t seem quite right. I put the images back in the bag and pondered some more. And went to Michael’s. And bought Modge Podge. I don’t think I’ve used Modge Podge since I was a kid and my Mom helped me decoupage some favorite post cards onto wooden plaques to hang on the wall. I put the images onto some orange card stock and then modged over the whole thing.

card4

When the Modge Podge dried, I finally felt like the images were done. Phew. I pulled out some patterned paper from my swap packet and then dug into my collection for blank cards, some twine (that came with the tags I bought for Month 1), pattern-cutting scissors, and the corner rounder. Wham! Bam! Tie! Glue! Snip!

card1

I handed out four of the six cards at our crafty day yesterday. The cards are definitely more awesome in person than in these not-so-awesome photos. Everyone seemed to like them. At least, no one used their card as a coaster or a blotter or a shim under a wobbly table leg.

So, that’s Month 2 done and here’s March only a wee bit done. Dare I start Month 3, or should I wait to spread out the fun?


Yearlong Swap – Month 1

Posted on

After our holiday tag swap, my crafty group decided we’d keep the swapping going. Because we are all busy folk, and we don’t see each other as often as we like, we decided to make one yearlong swap instead of trying to set up swaps each month or season or whenever we thought of it. Those of us who had swapped material packets last time seemed to have made that look sooo awesometacular that all 7 folks participating in this swap wanted to do it, too.

For this, the First Annual Queen Bee YearLong Swap, we all switched packets. Each month each crafter picks an item off the list (e.g., birthday card, thank you card, gift tag), makes six of those item, and delivers them to the other six folks in the swap.

Here’s my packet from the awesome Ginger:

100_3622

Ginger and I have different styles, so while everything in this packet is pretty, most of it isn’t stuff I would normally pick out on my own. At first this made me feel a bit uncomfortable, but then I realized this was what I wanted! A chance to try some new things! I also realized that I didn’t have to take the packet literally. That is, I didn’t have to actually use the physical items from the packet to use the packet. (Huh?) I found several pieces of paper in the packet that inspired me, but I didn’t want to use the actual paper. Instead, here is what I did.

First, I used acrylic craft paint to sort of rough coat some store-bought gift tags a pale blue. Then, I found the part of a piece of patterned paper from my packet that had some really pretty flowers on it. I cut out just that part, and then, using carbon paper, I transferred the flower image onto the tags.

100_3999

There was a part of me that really liked how this looked all on its own but not for this project. I could see myself using this technique again somewhere else and leaving it with just the carbon image. For this project, I bought a copper metallic paint pen and traced over the transferred image. Helpful hint, use a sharpish pencil to transfer the image if you want to cover with a paint pen. Because my pencil grew dull, the transferred image was a bit wide, and the paint pen did not completely cover it in all places. It looked a bit sloppy. Plus, the tag still seemed a bit bleh. So, I dug out my distressing kit next (which isn’t distressing in of itself). I put black distressing ink over top of everything, and that helped the leftover carbon bits blend in. Then I used sandpaper to rough everything up and sort of mix it together so it looked more put together. Finally, I put a little bit of bling on the tags with some little teeny pearly stickons that were in my packet.

100_4002

The tags I’d bought came with twine, but the finished tags called for something a bit more elegant, so I tied them off with brown ribbon from my stash.

100_4007

I’m not totally in love with the actual final product because they seem a bit rough to me. Sort of like I needed a bit more practice with what I was doing before making a final product. I really liked the image transferring with the carbon paper, and I definitely want to do that again.


Let’s Swap!

Posted on

Towards the end of last year, a group of my crafty pals decided we’d do a holiday tag swap. If you don’t know much about the crafty world, let me tell you that crafty folks (at least the paper crafty ones) really like to do swaps. Our group, The Queen Bee Croppers of NRV, has been around for three or four years now, and though we’ve talked about doing a swap many times, this was our first.

We had five folks participate, and of those five, three of us decided to add an extra level to the swap. We each made up a packet of stuff from our craft stashes and switched. I really love this sort of thing where you get a bunch of stuff and you have to make something out of it. I think it’s a great chance to work with items you wouldn’t normally choose, and I think it encourages stretching those creative muscles. Here are the materials I got in my swap packet:

100_2915

My packet was almost all paper, which threw me a bit. Then I started looking at things and realized the stripey paper would make a nice ribbon and the circle paper would make nice little medallion thingies. I very much wanted to make my tags using only the items in the packet (plus adhesives of course), and I almost did. Alas I broke down and used some of my quilling paper. I tried to make quilling strips from the papers in the packet, but nothing really worked.

Here’s one of the tags I made. They are supposed to be little Christmas packages.

label


My letterpress saga

Posted on

I’ve been dreaming about letterpress printing ever since I saw a kit in the craft store a few years ago. I did tons of research and window shopping and drooling, and then I started dreaming about a real letterpress press. Alas, I don’t have thousands of dollars to buy a real one (or a place to put one). I went back to dreaming about the made-for-crafters-not-real-printers kit. I found a great review of it somewhere from some dude who is a real printer, and he liked parts of it but not others and suggested other non-kit parts that were better. I put the good parts on my wishlist and waited. Andy bought one part of it for me for a gift about a year and a half ago, but not the other part. (He did not fully understand the complexity of all the parts. It’s okay. His geekdom lies elsewhere.) Over the next long, long while, I sat around and sadly pondered how I only had part of the stuff, wondering if anyone would ever give it to me as a gift. (Did it ever occur to me to buy it myself? No. That would make too much sense, and then what would I sit around sadly pondering??) Finally, this Christmas my brother gave me the final part, and my dream has been realized!

The image is a bit splotchy and the colors are a bit weird and you probably can’t even tell its indented into the paper, but I don’t care. I’m excited! It’s not too difficult, it’s fun, and some day I’ll have the stuff I need to clean up the ink properly! (Hint: Not water soluble.)

The printer dude who did the review recommended a great place to get custom plates made for cheap, and so I shall now begin to ponder my 2013 Christmas card, which will arrive in homes around the world this December!


Just can’t stop

Posted on

The post-Fair crafting daze has definitely lifted. Here’s what I’ve been working on the last two weeks:

1. Knotted fleece blankets for my Mom’s cats

While not the most challenging of projects, this is something fun to do while watching tv. It’s also a nice, quick project for pretty instant gratification. Plus, the cats love them, and my Mom requested them. I made two:

and

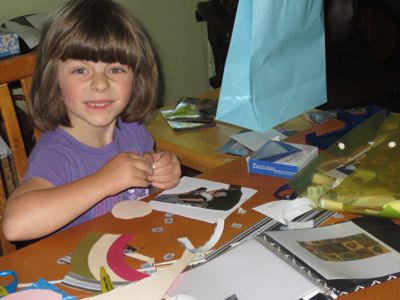
2. Twirly ribbon wands

Early in December, Anya was invited to a birthday party, and for a gift she picked out a ribbon wand thingy from the cool toy store. This was no ordinary stick with ribbon stuck on it; this was something out of rhythmic gymnastics. It swirled, it twirled, and most of all it made the kids OOOO and AHHHH. I remarked to one of the other parents there that surely it couldn’t be too hard to make one myself. So, I do what we all do, and I went to google and started looking around. I found several pages that I mixed together a bit including this one and this one.

Right now I only have one dowel made, but I have about a dozen ribbon parts mostly done. I’ve been experimenting a bit with different rings and swivels, and I think I’ve found the one I like best. I am a bit concerned that the little pokey bits on the swivel doohickey will snag the ribbon, but so far it hasn’t. That type of doohickey saves me having to use two rings, and they seem to be a bit cheaper.

3. Owl crewel piece (in progress)

Crewel is like embroidery but you use wool thread, which is like wee tiny baby yarn. This is a craft I tried out for the Fair and decided I really like, and my parents got me two kits for Christmas.

As I was working on this piece yesterday, it occurred to me that it wouldn’t be all that hard to draw my own design, use some iron-on transfer paper or something, and make my own crewel pieces. Now the wheels are turning…

4. Corn starch and baking soda Christmas ornaments

I re-pinned an item on Pinterest for these ornaments and figured I’d give them a try. Before I got started, though, I did a little googling because the directions lacked a wee bit of detail. All it said on the pin was to mix the two ingredients together and then WHAMMO! Clay! I had doubts. I found a neat blog that compared salt dough clay and cornstarch clay and also had complete directions.

I mixed up the clay, and all was great until I tried to roll it out. There is something about the feel of this stuff that makes me bonkers. I tried and tried, but I couldn’t touch the stuff. Thankfully, Andy was immune, and he and Anya got the ornaments cut out and on the tray.

To get the ornaments baked all the way through, we had to flip the ornaments over and put them back in the oven for a bit. A few on the bottom rack got a bit toasted and crinkly on the back. The top surfaces, though, were a joy to paint on. And luckily the finished material did not make my fingers scream. We all had a great time painting (except for my brother, who was at work, poor guy).

My best piece of advice for these (other than making sure you have complete directions) is to not make a double batch unless you are planning to give a bunch away. It doesn’t really seem like all that many ornaments until you start trying to put them all on the tree.

5. Bean bags

Felt is fun. I learned this about a month ago when I found a great book for making pincushions. I dug out a huge bag of felt I’d purchased quite a few years ago when I was hit with a strange urge to make a felt flower (with all the parts) for Master Gardeners. The felt, which I had for some odd reason bought a ton of, was in crazy bright colors: caution orange, electric green, and hot pink. These are not colors I really normally work with, and I couldn’t think of how to use them. Then one day at school, the yoga and movement teacher mentioned in passing how she would like to have some bean bags. AHA!

I realize bean bags aren’t super complicated, but I wanted a little research under my belt before I started. Did you know that if you search on “bean bags,” most of the hits will be for bean bag chairs and most of the rest of the hits will be for making the thingies you throw bean bags at for bean bag toss games. (Maybe that’s because bean bags aren’t super complicated?) I did find a few folks who wrote about how they made their bean bags, and of course I decided to not do anything the same way.

First, I made a template and traced the squares onto the felt using a sharpie. My squares were 5.5″x5.5″, but I made the template 3 bags long and traced in a grid sort of pattern. (I suppose I could have used a ruler and cut without marking, but since I sent my new rotary cutter home [does it even work on felt?], this seemed the easier route.)

Next, I used a zigzag stitch to sew up three of the sides. Since felt doesn’t ravel, I didn’t need to worry about sewing the right sides together and turning the pocket out to hide the seems. Plus, I kind of like the way the zigzags look.

Then, I filled each bag with 3/4 cup of rice. (Does that make them rice bags instead of bean bags?) I picked rice after it was recommended for one of the felt pincushions that started this whole shabang. It has a nice weight to it, and it doesn’t hurt too much when your kid flings a bag into your nose.

Finally, I sewed up the last side, trimmed the threads, and made the edges more even. Ta da! I’ll make the electric green ones tomorrow!


The Rest of the Story

Posted on

I apologize for keeping all of my fans in limbo for so long, but I’ve had blogger’s block.

So, how did I do? I not sure of the exact number of things I entered; it’s all a bit hazy now and my counting skills are off, but I’m going to go with 72. It took about an hour to get everything registered, and I was lucky number 13 to sign in. All the extension folks and volunteers helping were really nice and seemed to think my quest was pretty cool. The last item I completed was finished there next to the registration table where I sat on the concrete for about 15 minutes writing in the text for my scrapbook layout about the fair.

I turned my items in Thursday evening, and the fair wasn’t until Saturday morning, so there was some waiting and a weird sense of being lost in the world. When we arrived at the fair, Anya wanted to play on the bouncy house, but I am a mean mama and forced her to go to the exhibit room instead. It was pretty awesome to see all those ribbons.

Here’s a quick look at the main craft area. There was another craft table off to the right that you can see the very corner of, but you can see this isn’t big a competition and can maybe understand why I was inspired to start this project.

Here’s a list of everything I entered and what it won. I think I got most of the placing right, but some might be switched. (The ribbons got shifted when I packed up.) I’m really not sure about the grands/reserves…there are two not listed on here ’cause I just can’t remember where they go.

2 Garden Produce Fresh Fruit Misc. Fruit (1/2 pt) – 2nd
3 Garden Produce Fresh Fruit Tomatoes, Cherry (6) – None
4 Garden Produce Fresh Fruit Tomatoes, Red (4) – None
5 Garden Produce Fresh Fruit Tomatoes, Yellow (4) – None
6 Garden Produce Fresh Veg Beans, String (8) – 3rd
15 Garden Produce Fresh Veg Peppers (3) – 2nd
16 Garden Produce Fresh Veg Potatoes (4) – None
20 Garden Produce Fresh Veg Misc. Veg (pumpkin) – 3rd
21 Food Canned Fruit Apples – 3rd
23 Food Canned Fruit Peaches – 1st
60 Food Jelly Blackberry – 2nd
64 Food Jelly Misc. Jelly (apple) – 2nd
65 Food Preserves Apple Butter – 2nd
66 Food Preserves Berry (not strawberry) (raspberry) – 3rd
67 Food Preserves Strawberry – 1st and grand or reserve
69 Food Preserves Peaches – None
78 Horticulture Plants Flowering House Plant – None
81 Horticulture Plants Foliage House Plant – 2nd
87 Horticulture Cut Flowers Marigold (single stem) – 3rd
88 Horticulture Cut Flowers Meadow Flowers – 3rd
89 Horticulture Cut Flowers Zinnia (single stem) – 3rd
91 Horticulture Cut Flowers Mum (single stem) – 3rd
97 Horticulture Cut Flowers Misc. Cut Flower (single stem) – 2nd
98 Horticulture Cut Flowers Arrangement of Cut Flowers – 1st, grand or reserve
100 Horticulture Dried Flowers Dried Flower Arrangement – 2nd

103 Needlework Crocheting Doilies – 2nd
104 Needlework Crocheting Infant’s Set – 1st and grand or reserve
105 Needlework Crocheting Table Linens – 2nd
106 Needlework Crocheting Misc. Crocheted Item (market bag) – 1st
108 Needlework Knitting Infant’s Set – 2nd
111 Needlework Knitting Misc. Knitted Item (shawl) – None
112 Needlework Cross-Stitch Baby Item – 1st
113 Needlework Cross-Stitch Christmas Item – 1st
114 Needlework Cross-Stitch Wall Hanging (unframed) – 2nd
116 Needlework Cross-Stitch Beaded Item – 1st and grand or reserve (I think)
117 Needlework Cross-Stitch Misc. Cross Stitch Item (bookmark) – 1st
118 Needlework Embroidery Crewel – 1st
119 Needlework Embroidery Needlepoint – 1st
120 Needlework Embroidery Silk Ribbon Embroidery – 1st
122 Needlework Embroidery Table Linens – 2nd
123 Needlework Embroidery Misc. Embroidery – 2nd
130 Needlework Clothing Blouse or Shirt – 2nd
132 Needlework Clothing Dress – 1st and grand or reserve
133 Needlework Clothing Totebag or Handbag – 2nd
134 Needlework Clothing Skirt – 2nd
135 Needlework Clothing Misc. Clothing Article (cape) – 2nd
136 Needlework Quilt Pieced – 2nd
137 Needlework Quilt Wall Hanging – 2nd
139 Needlework Quilt Misc. Quilt – 2nd
141 Craft Handicraft Plastic Canvas Item – 1st
142 Craft Handicraft Button Crafts – 1st
143 Craft Handicraft Creative Craft (toothpicks, rolled paper) (quilled) – 1st
144 Craft Handicraft Creative Toy – 1st and grand
145 Craft Handicraft Item made from recycled materials – 2nd
146 Craft Handicraft Jewelry – 1st
149 Craft Home Craft Ink Stamped Item – 2nd
152 Craft Home Craft Decorative Painting – 1st
157 Craft Holiday Decorations Christmas – 1st and grand
159 Craft Holiday Decorations Hanukkah – 1st
161 Craft Holiday Decorations Fall – 1st
162 Craft Holiday Decorations Misc. Holiday (quilled valentine) – first
164 Craft Woodworking Wood Burning – 2nd
171 Craft Ceramics/Clay Hand Built Item – 2nd
175 Craft Art Drawing, Ink / Pen – 1st
177 Craft Art Metal Art / Metal Jewelry – 1st
178 Craft Art Stamping – 1st
181 Craft Art Scrapbooking (2-page layout) – 1st and grand or reserve
183 Craft Art Mosaic – 1st and grand or reserve
184 Craft Art Misc. Art (glass beads) – 1st

How do I feel about the outcome? Well, I am very bummed my knitted shawl didn’t win anything, but I am very giddy that my strawberry jam won first place. I can’t believe my Hanukkah item beat a Hanukkah item made by some who actually celebrates that holiday, and I think some of the cherry tomatoes I submitted were fermenting. All in all, the whole thing is pretty awesome.

What have I been doing since September 22? I did work on my scrapbooks for the first time in a year. Other than that, I’ve only been interested in crocheting market bags (106). I’ve done five so far and have number six about half done. Why? Why do I want to make all these bags? I do not know. I didn’t manage to finish Anya’s sweater in time to enter it, and I do want to finish it, but when I pull it out all I can think about is making more bags. Perhaps I want to go shopping?

On a related note, I want to mention that Andy’s pickles won first place, and Anya (who entered 3 craft items) won two first place ribbons, a third place ribbon, and a grand champion ribbon. Our family totally dominated the 2012 Floyd Fair.

Thank you to all my friends and family who followed along and supported me during this quest. I shall leave you with a part from some poem I was forced to memorize in elementary school:

Somebody said that it couldn’t be done,
But he with a chuckle replied
That maybe it couldn’t, but he would be one
Who wouldn’t say so till he tried.

–From “It couldn’t be done” by Edgar A. Guest